


A garage is a somewhat strange place, isn’t it? Do you put your car in there or all your junk that won’t see the light of day for the next five years?
Converting a garage into a functional space within your home is a great idea. You don’t want it to cost a bomb, so keeping costs down is important.
Table of Contents
Learning how to insulate a garage will help you immensely.
Back in the day, I worked for a huge building contractor before becoming a builder myself. I have always enjoyed a garage conversion because it is straightforward, and the opportunity to create something amazing from the space is an exciting prospect.
In this guide, I’ll help you learn how to insulate a garage so that when you dive in and complete the work yourself, it’s as straightforward as possible. Let’s jump in.
Tools Needed
See below. The first step to take is to ensure you have the right tools for the job.
- Ladder or small scaffolding
- Sealant gun
- Screwdriver set
- Tape measure
- Staple gun
- Drill driver
- Hammer
- Safety Goggles
- Gloves
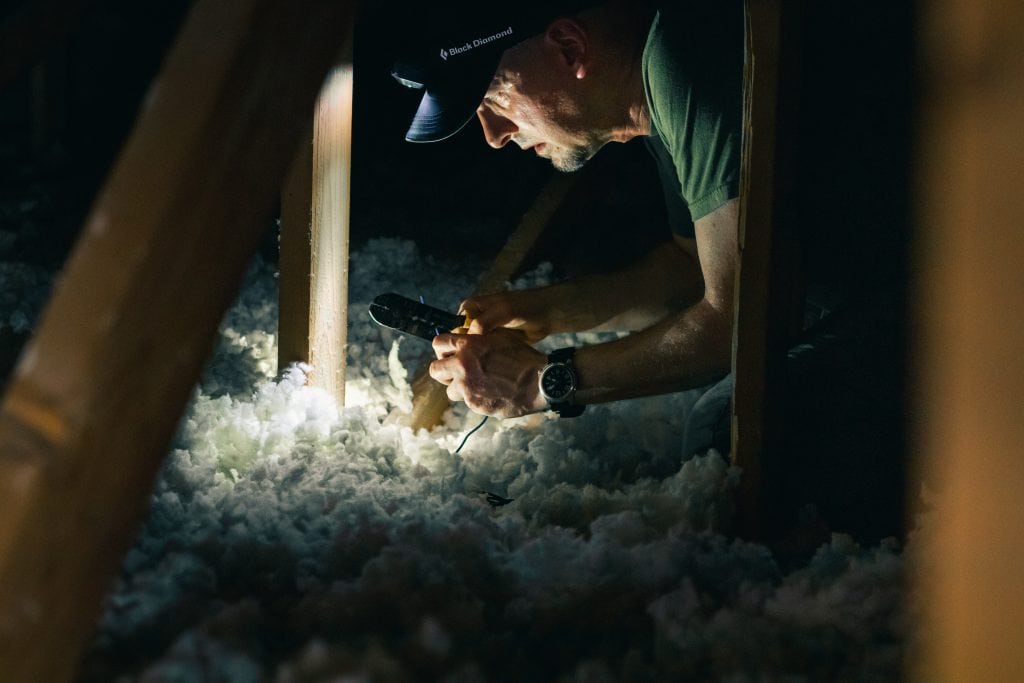
How to Insulate a Garage Ceiling
Let’s start off with the ceiling. Insulating your garage ceiling is essential to reduce energy loss through the roof. Heat rises, after all, and if you have a cold roof with poor insulation, you will know about it, especially in your wallet.
1) Prepare Your Ladder or Scaffolding:
Check your ladder or scaffolding is in good condition and set it up securely. If you’re using a ladder in any precarious situation, having someone “foot” is a good idea to prevent it from slipping.
2) Measure the Ceiling:
Use your tape measure to measure the length, width, and depth of your garage ceiling. These measurements will help you determine how much of your chosen insulation material you’ll need.
Measure the distance between each ceiling joist to cut the insulation to the correct size.
3) Cut your Insulation Material to size:
Using your measurements from step 2, cut your chosen insulation material to fit. If you’re using rigid foam insulation, you can use a saw to cut it to the correct dimensions.
Use a Stanley knife to score if you’re working with fibreglass insulation. Ensure the insulation fits snugly between the joists, as you want to avoid gaps where you can help.
4) Start adding the insulation:
Insert the cut insulation pieces between the ceiling joists. As mentioned above, ensure the insulation is placed evenly and fits snugly to minimise gaps or spaces.
A staple gun is used to secure the insulation and attach it to the joists. Stapling the insulation flanges or tabs to the joists’ sides will help hold it securely.
5) Fill Remaining Gaps with Expanding Foam:
After the insulation, there may still be some small gaps, especially in corners or tricky-to-reach areas. Expanding foam seals these gaps and improves the insulation’s effectiveness.
Always follow the manufacturer’s instructions for safe and practical application.
6) Finish the Ceiling:
Now that the insulation is in, your ceiling can be finished with plasterboard or your chosen material. Once the ceiling board is in place, it should hold everything together nicely.
How to Insulate a Garage Door
Next, onto the garage door. Insulating your garage door can dramatically improve the temperature control in your garage.
Garage doors are often huge, so as you can imagine, they lose a lot of heat. Check out the below steps on the best way to insulate your garage door:
1) Clean the Garage Door Panels:
Before starting, it’s important to ensure the garage door panels are clean. Remove any dirt or debris from the surface. A clean surface will enable the insulation to be better in place.
2) Measure the Door Panels:
Grab your tape measure and check the height and width of each panel on the garage door. You want to cover the door’s entire surface, so try to be as accurate as possible.
3) Cut the Insulation Material:
Using the measurements from the previous step, cut your chosen insulation material to fit the dimensions of each panel. Have your insulation material match the size of the door panels for a super-snug fit.
4) Install Retainer Pins:
Retainer pins are small spikes with flat bases that will secure the insulation to the door panel. Stick these retaining pins on the door panel as directed.
These pins are anchors, sticking to the door surface and holding your insulation material in place. Make sure to place them evenly to ensure your insulation remains solid.
5) Secure the Insulation:
Once the retainer pins are in place, carefully position your cut insulation onto the door panel. Make sure that it aligns properly with the panel’s dimensions.
Press the insulation against the retainer pins to secure it in position. The retainer pins should hold the insulation in place and prevent it from sagging or falling off.
6) Repeat the Process for Each Panel:
Continue these steps for each panel on the garage door until the entire door is covered with insulation.
7) Install Weather Stripping:
You can apply weather stripping over the insulation if you want to go further. Weather stripping helps block drafts and seal gaps.
8) Consider The Doors Balance
Your garage door needs to maintain its balance consistently, as any imbalance can lead to various damage over time. If you partially open and release it, the garage door should stay in its position.
If you’ve followed these steps correctly, you can congratulate yourself for a job well done, as your garage will now be more comfortable and, even more importantly, energy-efficient.
On the other hand, if the door descends when released, this indicates an imbalance, and the spring tension requires readjustment. In such a situation, it’s advisable to seek the expertise of a professional to ensure the door’s balance is correctly adjusted.
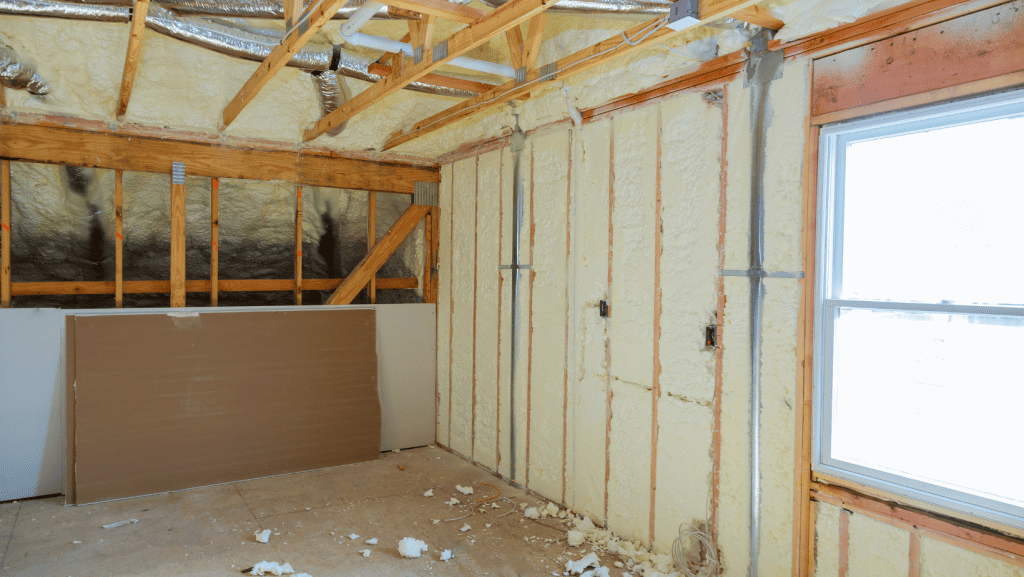
How to Insulate A Garage Wall
Now that the ceiling and the door have been done, you’ll want to finish the walls next. Uninsulated garage walls will cause extreme heat loss and contribute to low energy efficiency.
Check out the below steps on how to insulate a garage wall:
1) Remove Any Screws or Hooks From the Walls:
Any fixtures currently on the wall will need to be removed. These items will get in the process and provide you with an uneven surface to work off, which we don’t want.
2) Ensure The Wall Is Clean:
The wall surface must be free from any obstructions like old plaster. A clean surface allows the insulation to sit flush and provide an airtight seal.
3) Check for any gaps or cracks in the wall:
Inspect the walls for gaps, cracks, or holes that compromise insulation and heat loss. Seal these openings using expandable foam or another filling sealant.
4) Apply the insulation of your choice:
Select the internal wall insulation you’ve chosen and install it snugly within the cavities. Spray foam is the easiest solution for cavities. If you’re creating fixings on the current wall, fibreglass or rigid foam insulation is recommended.
5) Cut the insulation to fit between the wall studs:
If your wall does not have wall cavities, you can create wall studs to hold your insulation in place.
This creates a space between the wall and the insulation, preventing any moisture from the wall from reaching it. This approach is handy when the wall surface is irregular or uneven.
Once the stud wall has been created, you can fit the insulation material of your choice between the wall joists for a snug fit and finish off with fixing plasterboard to keep the insulation in place and provide a professional finish.

Understanding Building Regulations
As always, when doing major work on your home, it's important to read up on the rules around insulation building regulations. You can read up on it HERE.
How to Insulate a Garage Floor
Finally, insulating your garage floor can make it more comfortable to walk on and increase its energy efficiency. A cold floor exposed to the elements is not fun for anyone.
You can even go one step further and install underfloor heating if you want to push the boat out.
Check out the steps below on how to insulate a garage floor:
1) Cover the Floor with a Damp Proof Underlay:
Start by placing an underlay over the floor. The underlay is a moisture-resistant layer to prevent dampness from seeping through the floor. It’s essential to ensure this barrier is correctly sealed at seams and edges to be as effective as possible.
2) Lay Rigid Foam Insulation Panels on Top of the Underlay:
On top of the underlay lay rigid foam insulation panels. These panels are the best way to provide thermal insulation to the floor, helping to maintain a comfortable environment. Make sure the panels fit snugly together, and there are no gaps.
3) Cover the Insulation Layer with Plywood Sheets:
Once the insulation panels are in place, cover them with plywood sheets. Plywood serves as a solid, even surface for the floor. Ensure that the plywood sheets are well-positioned to cover the entire insulation layer.
4) Attach Two Layers of Plywood with Utility Screws:
Attaching two layers of plywood to enhance the floor’s structural integrity is a good practice. You can screw both sheets together before laying on top of your floor insulation and fixing it.
5) Use Tiles or Mats to Seal the Floor or Paint the Plywood Surface:
You have a few options to finish the floor. You can lay tiles or mats on top of the plywood surface. Alternatively, you can paint the plywood surface, which is cheaper. The choice is yours and how you want to finish your floor.
Insulation is essential to converting your once-cold garage into a habitable space. It makes the area more comfortable, enhances energy efficiency in your home, and protects garage items from humidity and rust.
What Is Insulating My Garage Going to Cost?
The size of the garage plays a significant role in the insulation cost, as larger garages require more insulation material, thereby increasing your overall cost.
The type of insulation significantly influences expenses; for instance, spray foam insulation is more expensive than fibreglass.
Opting for a professional to complete the installation may incur higher expenses than getting your DIY belt out and doing it yourself.
Check out our table below for the rough prices.
| Cost of Insulation | Unit | Average Cost (excl. VAT) |
|---|---|---|
| Garage Wall Insulation | per m2 | £50 |
| Garage Roof Insulation | per m2 | £40 |
| Garage Floor Insulation | per m2 | £40 |
FAQ's
Insulating your garage does not have to be expensive. One inexpensive option is to utilise fibreglass insulation. This sort of insulation is very affordable and straightforward to install yourself.
Yes, absolutely! You can efficiently insulate your garage with the correct supplies and instructions. One of the most popular DIY insulation solutions is fibreglass batt insulation, which is reasonably simple to install for beginners.
However, it is important to take safety precautions, such as wearing gloves, goggles, and a mask, to avoid skin irritation from insulating materials.
Try using foam board insulation when looking for a low-cost insulation solution for your garage. Insulation is usually less expensive than alternatives, such as spray foam insulation. It is cut to fit the measurements of your garage walls.
Another inexpensive option is to utilise fibreglass batt insulation, which gives adequate insulating characteristics at a cheaper cost.
Furthermore, fixing air leaks with caulk or weatherstripping can increase the insulation’s efficacy without incurring considerable costs.
You can accomplish appropriate garage insulation without breaking the bank by focusing on low-cost materials and practices.
Foam board insulation is frequently seen as the easiest option for DIY enthusiasts or those seeking a simple insulation solution to install in a garage.
Unlike fibreglass batt insulation, which requires precise cutting and fitting, foam board insulation can be cut to size with a utility knife and bonded straight to garage walls. Its simplicity makes it an appealing option for beginners or those with little DIY experience.
When learning how to insulate a garage, starting with the walls and working your way down to the floor is usually recommended. Insulating the walls helps form a thermal barrier, which is necessary to keep a pleasant temperature inside the garage and avoid heat loss.
How To Insulate A Garage
Thank you for checking out our article on how to insulate a garage. If you're looking for more handyday DIY tips and advice, go check out our blog HERE for more sound advice on your home DIY needs.