


Energy bills have been an absolute ball-buster for many people across the UK over the last few years. We’re all on a mission to cut costs and save some money, and your windows and doors can contribute to a large amount of heat loss.
DIY Secondary Glazing Kits are an easy-to-install solution that offers an affordable alternative to traditional double glazing. They help insulate your windows and keep out nasty cold air from your expensively warm home.
Table of Contents
With a DIY secondary glazing kit, you can help reduce heat loss or noise pollution in your home, thus reducing your bills. With so many possibilities, selecting the best kit to suit your home and windows can be time-consuming.
I’ve handpicked the 5 best glazing kits below to help reduce your energy bills and provide a quick and effective solution to keeping your home cosy and comfortable. All kits are straightforward to install and are highly well-rated for reducing draughts and noise pollution.
The Top 5 Best-Rated DIY Secondary Glazing Kits
Here are my top 5 secondary glazing kits you can currently purchase. All have passed our scoring process to rank at the top of the leaderboard.
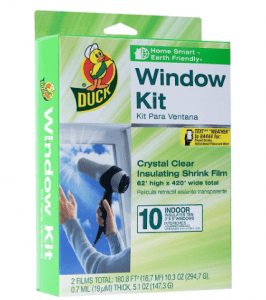
Duck Indoor Shrink Film Window Kit
- Quality - 9/10
- Ease of Installation - 8/10
- Draft Protection - 9.5/10
- Noise Reduction - 9/10
- Dad Satisfaction - 10/10
When I purchased the Duck Indoor Shrink Film Window Kits, I immediately anticipated a complicated process and a flimsy end result. However, I was pleasantly surprised when the product met and exceeded my expectations, delivering solid performance and fulfilling its promises.
While the initial setup presented a slight learning curve, I quickly mastered the process when I reached my third window.
Although the film is slightly visible, with edges that may not be the most attractive, its ability to keep out the cold, particularly on draughty sash windows, is excellent.
However, while it significantly improves insulation and noise reduction, it cannot fully replace double glazing and should be viewed as a supplementary kit rather than a long-term solution.
The reduction in condensation after installing it was a game changer, and I no longer noticed previous outside noise over time.
The product itself is generous, providing a few extra centimetres of film than advertised, and the included amount of tape was more than enough for the installation process.
While the roll-on method proved relatively straightforward, it required precision to ensure the top edge was aligned correctly for a good application along the window, so you definitely need to take your time applying it.
One minor drawback I encountered was the potential for waste when cutting through the folded film on the right edge, which could have been utilised for another window.
The Duck Indoor Shrink Film Window Kit offers a solid and practical solution for improved insulation in your home. While I have had positive experiences with other Duck Brand products, this one stands out as the best secondary glazing kit I’ve used, earning it my top recommendation.
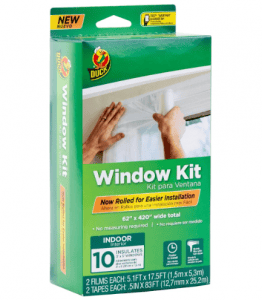
DUCK Brand Rolled Shrink Film Window Kit
- Quality - 8/10
- Ease of Installation - 8/10
- Draft Protection - 9/10
- Noise Reduction - 9/10
- Dad Satisfaction - 9/10
During the fitting process, I found that working with this DUCK Brand Rolled Shrink Film Window Kit required some patience, as it tended to adhere to itself, making achieving a straight-cut challenging.
However, the effort pays off in the end. After fitting the product with a tight seal and leaving it overnight, the benefits were there to be felt and heard. I used a hairdryer to ensure it dried and fixed properly for that final touch, allowing proper application.
I observed minimal condensation, a significant improvement in heat retention within the room where I tested, and a noticeable enhancement in sound insulation. The reduction in outside noise, such as traffic from the main road outside, was particularly impressive.
While the film is discreet, I noticed a slight haziness, which can be expected with this product type.
However, overall, I was satisfied with the Duck-rolled window kit. Despite the initial finicky setup, it was easy to use, and the result looked good.
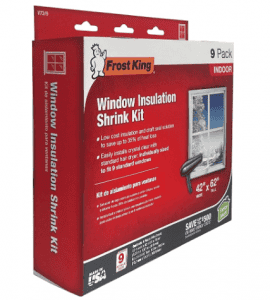
The Frost King Clear Indoor Shrink Window Kit
- Quality - 8/10
- Ease of Installation - 8/10
- Draft Protection - 9/10
- Noise Reduction - 9/10
- Dad Satisfaction - 8/10
The Frost King Clear Indoor Shrink Window Kit deserves its spot as a worthy bronze winner.
The application process was reasonably straightforward, and using a hairdryer effectively smoothed out any ripples, resulting in a pleasant and clear view through the glass.
Applying it to three windows took around 20 minutes, but I quickly entered the flow and completed the room in just over half an hour.
However, the major drawback is that if you intend to open your windows during the warmer months of the year, which, let’s face it, everybody does, you must remove the tape; otherwise, as stated, sunlight and ordinary wear can cause the tape to fail over time.
Due to this, I rank this in the third position. It’s a good and very straightforward bit of kit, but removing it if you want to use your window can be a significant pain.
Duck Window/Patio Door Kit
- Quality - 8/10
- Ease of Installation - 7/10
- Draft Protection - 9/10
- Noise Reduction - 9/10
- Dad Satisfaction - 8/10
Rocking in at fourth is the Duck Window/Patio Door Kit, yet another commendable offering from the Duck brand.
The quality of the plastic film is impressive, and the double-sided tape is user-friendly. It ensures easy application and removal without leaving any marks on your window or door frame.
While I initially found cutting the film to size a bit of a hassle, I eventually devised a method by laying it down on the floor, folding it where the cut was needed, and then using sharp blades for precision.
Installation proved straightforward. To achieve a polished look, simply apply the double-sided tape to the edges of the window frame and finish off with a hairdryer.
Admittedly, this kit demanded more effort to use efficiently, and it took me some time to establish a solid system for application. However, once I got the hang of it, the results were impressive, making it a good quality product overall.
Duck's indoor Roll-On Window Insulation Kit

- Quality - 7/10
- Ease of Installation - 9/10
- Draft Protection - 9/10
- Noise Reduction - 9/10
- Dad Satisfaction - 8/10
Coming in fifth and my final recommendation is the Duck’s indoor Roll-On Window Insulation Kit.
This roll-on product is a much easier alternative to the measure, cut, and stick process I followed with the other four kits, which required surface preparation.
Ensuring your surfaces are impeccably clean is essential. I found that using rubbing alcohol and a paper towel did the trick, although it did take some time to get it just right.
I applied all the tape to my windows but only removed the protective top once the film was rolled onto the top and unfolded, saving me considerable time.
Using a hair dryer over the edges and firmly pressing the film to the tape with my fingers while shrinking it yielded pretty impressive results, leaving the windows looking clean and well-insulated.
Despite requiring significant prep work before application, this kit secures its spot at number five. While other kits may be easier to use, this one still performs admirably.
What Are DIY Secondary Glazing Kits?
DIY secondary glazing kits are a low-cost and effective option for homeowners to improve window insulation, reduce unwanted street noise, and boost energy efficiency.
With rising energy prices in the UK and a growing need for soundproofing, these kits have gained popularity among households.
DIY secondary glazing adds a layer to your existing windows, creating a barrier that helps trap heat and decreases noise transmission.
What Are The Benefits of DIY Secondary Glazing Kits?
There are many benefits to installing DIY secondary glazing in your home. Here are some of the primary benefits:
Energy Saving
One of the primary benefits of DIY secondary glazing kits is that they increase your home’s energy efficiency.
They help prevent heat loss during the colder months (roughly 8 months in the UK!) In addition, installing an extra layer of insulation will help keep your home cool during the summer months.
All these will result in significant savings on your energy bills throughout the year.
Noise Reduction
Another advantage is that a glazing kit reduces noise pollution, which is especially useful if you live in an area with traffic or on a major road.
DIY secondary glazing provides an additional barrier against outside noise, resulting in a quieter environment within your home.
Historic or listed building preservation
Double glazing may conflict with preservation guidelines if you live in a historic or listed building.
In these situations, secondary glazing is an excellent option. It improves insulation and energy efficiency while preserving the building’s original character and look.

A Step-by-Step Fitting Guide for DIY Secondary Glazing Kits
The DIY secondary glazing kit installation process is pretty simple and universal across all the kits listed above. I’ve devised a quick run-through below.
Preparation
Thoroughly clean the existing window frame and glass so the product sticks well. Once cleaned, measure the window’s dimensions to determine the size of the secondary glazing panels needed.
Ordering and Measuring
- Take precise measurements of the window frame, allowing for any clearances that may be required.
- Select the appropriate size and type of glazing kit based on your measurements and requirements.
- Get the existing window ready, which should have been done in the preparation stage.
- Remove any existing window treatments like curtains or blinds, so you have a clear run at the window. The last thing you want is your brand new pencil pleat curtains in the way.
Fit the Secondary Glazing Panels
- Follow the instructions included with your DIY secondary glazing kit.
- Install the glazing panels with the system of your choice (magnetic, sliding, screw-secured, or stick-down).
- Adjust the panels and check for gaps or air leaks to ensure a snug fit.
Sealing and Finishing Touches
- To create a tight seal, wrap weather stripping or sealant around the edges of the secondary glazing panels. You can use a hairdryer to ensure a firm hold.
- Trim any excess material to achieve a neat and professional look.
- To ensure the windows work properly, open and close them several times so nothing is catching.
Maintaining and Cleaning Your Secondary Glazing
Regular cleaning is required to ensure the longevity of your DIY secondary glazing kit. Here are some pointers to remember:
- Regularly clean the glazing panels with a mild detergent or glass cleaner.
- Use abrasive materials or harsh chemicals sparingly, as they may damage the panels.
- Check the weather stripping and seals regularly and replace them as needed.
- Inspect the frames and fixings for wear or damage and make any necessary repairs.
DIY secondary glazing kits provide an economical way to improve your home’s energy efficiency and sound insulation.
These kits allow homeowners to save time and money by completing the job on their own with the help of easy-to-follow instructions and pre-cut supplies.
DIY secondary glazing, which adds an extra layer of insulation to existing windows, can reduce heat loss, minimise outside noise, and improve overall comfort in your living space.
Installing secondary glazing using a DIY kit is surprisingly simple, especially for individuals with limited DIY knowledge.
These kits usually include all essential components, including panels, fittings, adhesive tapes, and complete instructions.
Following the step-by-step instructions, householders may obtain professional-quality outcomes without needing specialised gear or professional help.
Whether you want to enhance thermal efficiency or minimise noise pollution, DIY secondary glazing offers a hassle-free option that everyone can handle.
When choosing the right glass thickness for your secondary glazing, you must consider several factors, including insulation requirements, noise reduction goals, and visual tastes.
Thicker glass panes provide superior thermal insulation and soundproofing, minimising heat loss and external noise transmission. However, combining these advantages with practical issues such as window frame depth and total weight capacity is critical.
While secondary glazing has significant advantages regarding energy efficiency and sound insulation, it is essential to know the potential negatives before commencing any project.
One typical issue is that adding another layer of glass may result in a modest reduction in natural light transmission. Furthermore, some homeowners may discover that secondary glazing modifies the look of their windows, particularly if placed incorrectly or with materials that do not suit the current design.
However, these disadvantages are frequently overcome by the enormous increases in comfort and energy savings that secondary glazing delivers.
DIY Secondary Glazing Kits
Thank you for reading our article on the best 5 DIY secondary glazing kits. We hope you enjoyed it. For further handydad advice and tips around the house, go check out our blog HERE.