


When performing essential maintenance, learning how to clean a filter on an outside oil tank should be at the top of your list.
A clogged filter that has yet to be looked after can cause inefficient performance decreased heating performance, and even damage your oil tank system.
If the cleaning steps are followed, your domestic oil tank will continue to perform efficiently, ensuring that your home remains fuelled in the long run.
Table of Contents

How To Clean A Filter on an Outside Oil Tank
Now that you’re ready and have the right tools let’s look at how to clean a filter on an outside oil tank. The steps below will assist you in a successful cleaning process, thus ensuring your filter looks brand new by the end of it.
Step 1: Preparation
Preparation is key before beginning the cleaning process. Before you start unscrewing things, let’s take a look at the steps below.
Gather the following tools and materials:
You’ve done this; next step, please.
Take safety precautions:
Get your safety gear on your face and hands. Check.
Switch off the power:
Turning off the power supply to the oil tank before cleaning is imperative to prevent accidents or interruptions. Under no circumstances should power be flowing to the tank while disassembling it.
Step 2: Cutting Off the Oil Supply
Now the power is off, you’ll need to shut the oil supply off next. Turning off the oil supply to the tank before cleaning the filter is critical.
Locate the oil supply valve near the tank or fuel line and switch that off. To stop the oil flow, ensure that the valve is completely closed.
- This will reduce the risk of oil leakage, which will certainly get in your way and create a safer working environment.
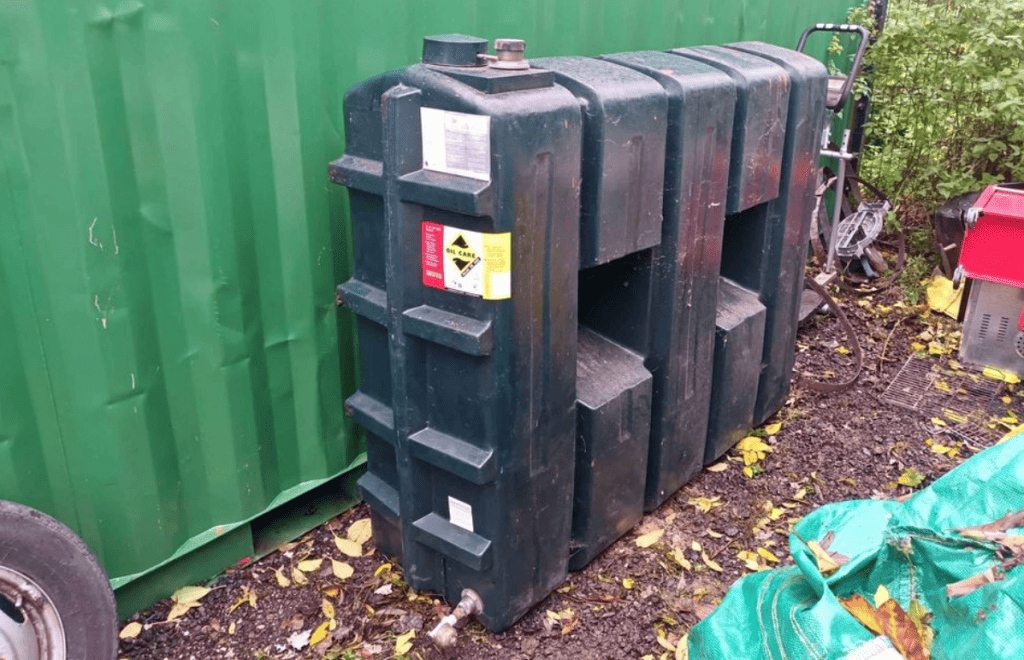
Step 3: Locating the Oil Filter
If you don’t know where the oil filter is before changing it, you’re not going to get very far, so here’s how to find it on the oil tank if you’re unsure:
- Look for a small access panel or door on the tank’s side or top.
- Examine the tank for labels or markings indicating the precise location of the oil filter.
- If there are no labels, look for a bulging cylindrical or rectangular shape attached to the tank.
- Examine the area near the oil supply line, as the oil filter is usually installed nearby.
- If you need help locating it and need help, consult the owner’s manual if you still have it, or seek the assistance of a professional.
Once you have located the oil filter, you can proceed to the next step of taking it out for cleaning.
Step 4: Removing the Filter
We must remove the filter from your domestic oil tank and begin cleaning. Follow the steps below to do this as efficiently as possible.
You’ve followed all the safety and pre-steps above, so you can continue.
- Carefully loosen and remove the filter from its housing using your filter wrench. This could need some elbow grease to remove, depending on how long it has been since the last change. Make sure to make a note of any spills and clean them up right away.
- Take your time and inspect the filter, looking for signs of damage or excessive sediment buildup. There’s no point cleaning it if it’s on its last legs.
- Replace the filter if it has seen better days and has any damage. The most common method of disposing of your oil filter is to take it to an oil bank. You can check the location of your closest oil bank HERE.
Step 5: Cleaning the Filter
After you’ve removed the filter, it’s time to make that bad boy look brand new again. You want your domestic oil tank to work as efficiently as possible, so now is the time to shine.
What is the best method for cleaning the filter without causing unnecessary damage? Check the below:
- First, look for any visible debris or buildup in the filter. If you notice excessive dirt or clogs, you must clean it properly.
- Start by scrubbing the filter gently with a soft brush or cloth to remove any dirt or particles that have attached to it. The key word here is ‘gently,’ as you want to avoid going total Arnold Schwarzenegger and breaking it in half.
- A mild detergent or specific oil filter cleaner can help if stubborn dirt or grime is tough to remove.
- To remove any leftover residue, thoroughly rinse the filter with warm water.
It is crucial to thoroughly clean the filter in the oil tank before reinstallation, as even small amounts of dirt or debris can decrease filter efficiency and lead to potential issues.
Step 6: Reinstalling the Filter
So, you’ve put your back into it, and your filter is sparkling clean again. It’s time to get that sucker back in.
- Firstly, align the filter with the oil tank’s designated slot; don’t just ram it in and twist it.
- Push the filter firmly into place, ensuring that it is securely seated and that movement is restricted. You will know when this is fixed correctly, and it will feel solid.
- Quickly review the filter area for leaks, additional grime, or loose connections, and make any necessary adjustments are completed alongside any further cleaning.
- Give it all a once over and ensure everything is as before.
After you’re done with the installation, turn on the oil supply and give it a careful look to check if there are any leaks or abnormalities in the oil flow. This way, you can be sure that the filter is working fine and that the oil in the tank is getting filtered effectively.
Step 7: Turning On the Oil Supply
Follow these steps to restart using your domestic oil tank after the spring cleaning of the filter has been completed.
- Ensure all connections and fittings around the filter and tank are secure and tight.
- Turn the oil supply valve back on by gently rotating it clockwise.
- Keep an eye on the oil tank gauge or indicator to ensure the oil is getting delivered to the tank.
- Examine the oil supply lines and filter for signs of leaks or malfunctions.
- If everything appears to be working, you can restart the heating system or oil-powered appliance.
- Allow a few minutes for the system to run to ensure proper oil flow and circulation.
- There you have it; you’ve learned how to clean a filter on an outside oil tank.


Need A Top Quality Filter Wrench?
A Dad is only as good as his tools, so if you're learning how to clean a filter on an outside oil tank and need a top quality filter wrench to get the job done, check out our top pick HERE
Why Should You Clean The Filter On An Outside Oil Tank?
Learning how to clean a filter on an outside oil tank is necessary for several reasons, but why should you do it?
For starters, it ensures that the oil flow is not obstructed, which could decrease performance and even damage the oil tank system over time.
Ensuring you regularly clean the filter will allow that oil to flow freely, provide consistent heating to your home and prevent blockages or malfunctions.
A clogged filter can also cause sediment, debris, and impurities to accumulate in the oil, reducing quality.
When this happens over time. There is a risk that the oil will become contaminated, resulting in poor combustion and reduced efficiency.
Cleaning the filter removes these impurities effectively, ensuring the oil remains clean and of high quality.
Finally, cleaning the filter is essential for the longevity of the oil tank system. The tank’s accumulation of debris and sediment can cause corrosion and deterioration over time.
Regular cleaning is essential for extending the life of the oil tank and being able to use it for years to come.
Before you set out for some cleaning, you must have the necessary tools and materials. Check out the list below of the tools required for this messy work.
Additional Tips and Safety Precautions
Check out these additional pointers and precautions to take when learning how to clean a filter on an outside oil tank:
- Inspect the tank regularly for signs of damage or leaks.
- Before cleaning, turn off the tank and disconnect the power source.
- Use safety equipment, such as gloves and goggles, to protect yourself from chemicals or debris. Oil in the eye is certainly not fun.
- Always follow the manufacturer’s cleaning instructions and use the recommended cleaning agents.
- If the filter has become clogged, remove it and thoroughly clean it with a soft brush and clean water before pouring down the drain.
- Once the filter has been cleaned, ensure it is scorched before reinstalling it.
- Check the tank’s gaskets and seals to ensure they are in good condition. Replace any worn or damaged parts.
- Always check the filter regularly for signs of clogging or damage. As needed, clean or replace it.
- Dispose of any waste or cleaning agents following local regulations and guidelines.
- If you run into any problems or need clarification about the cleaning process, seek the advice of a qualified technician.
How To Clean A Filter On An Outside Oil Tank FAQ’s
Remember to change your oil tank filters once a year, ideally during autumn when the weather cools. It’s an important task to add to your household to-do list.
It’s super important to keep your engine running smoothly; one way to do that is by regularly changing the oil filter.
Otherwise, you might end up with significant blockages that’ll slow down the oil flow, and that’s no good for your engine.
Trust me, you don’t want to risk damaging it because you forgot to replace the oil filter!
1. Increased Energy Costs
2. Reduced Heating Efficiency
3. Noise-Producing Operation
4. Equipment Failure
The Bottom Line
Keeping your oil system running efficiently and dependably is essential, and one way to do this is by regularly cleaning the filter on your outside oil tank. Don’t worry, it’s easy!
Follow our guide on how to clean a filter on an outside oil tank to ensure thorough cleaning and reduce the risk of issues or breakdowns. Use the right tools and materials, and follow the additional tips and safety precautions provided.
Regular filter cleaning not only extends the life of your tank but also ensures optimal heating performance over time.
So, now you know how to clean a filter on an outside oil tank, you can reap the benefits of a clean and efficient oil tank system.
How To Clean A Filter On An Outside Oil Tank
Thank you for reading our article on How To Clean A Filter On An Outside Oil Tank. If this has been useful, please check out our blog HERE, for more DIY tips and advice, tailored for Dads maintaining their home.